


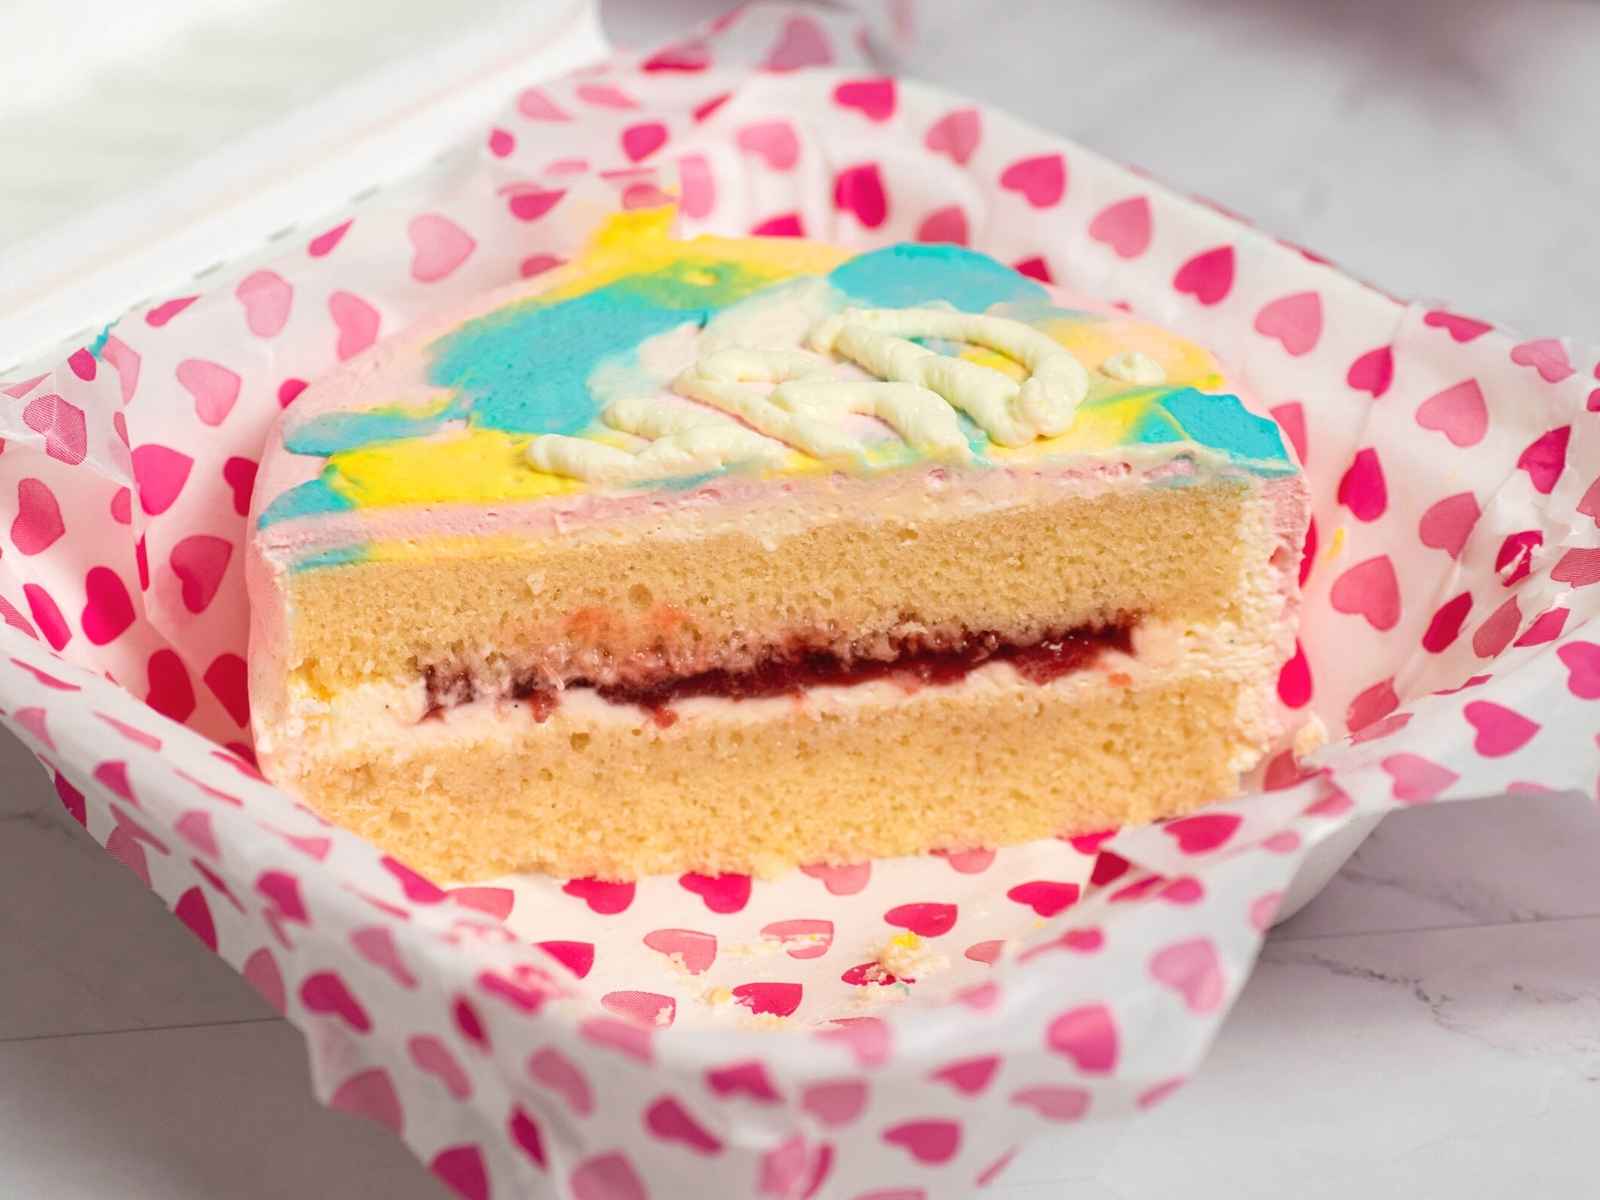
The most adorable Korean lunchbox cake made with vanilla sponge, cream cheese frosting and jam filling. These cute mini cakes are ideal for single servings and served in a takeout box. Perfect for any special occasion!

Incredibly popular across South Korea and other Asian countries, Korean lunchbox cakes are taking the rest of the world by storm. They’re typically much cheaper than buying a full-size cake and are more customisable, which makes them extremely popular.
These mini cakes are incredibly easy to make, versatile and can be customised for any occasion. Whether you’re celebrating an anniversary, an accomplishment or just looking to make someone’s day – this bento cake is ideal for any celebration!
Sometimes a full-sized cake is too much for only a few people, so Korean lunchbox cake is the answer because it's perfect for a single serving. And did I mention how incredibly cute they look?!
Since I love everything adorable and delicious, I wanted to share this amazing Korean lunchbox cake recipe with all of you! If you’re a fan of Korean recipes, check out this decadent Korean Cream Cheese Garlic Bread, quick and easy Korean Strawberry Milk or extra cheesy Korean Corn Dogs.

What is a lunchbox cake?
Korean lunchbox cake is a type of small, single-serving cake served in a small takeaway box. They are sometimes referred to as mini cakes or Korean bento cakes and are served at special events.
In Korean cafes they are known as 도시락 케이크 (dosirak keikeu), which literally translates to ‘lunchbox cake’. Other bakeries call them 레터링 도시락 케이크 (letoring dosirak keikeu), which means ‘lettering lunchbox cake’. They can also be called ‘bento cakes’ after the Japanese bento boxes, which are a single serving packaged meal.
Lunchbox cakes started becoming popular in South Korea a few years ago. Koreans like to celebrate all types of occasions with cakes (30 days or 100 days anniversaries, other life or relationship milestones). Full-sized cakes with customised lettering on top can be quite expensive, so Korean lunchbox cake was created as a cheaper alternative. This way, you still get a cake with your own message written on top, but at a fraction of the cost of a regular cake. This is why the bento cake's small size is extremely appealing and cost-effective.
In addition to the size aspect, serving cakes in lunch boxes makes it a wonderful surprise. No one would expect such a cute and sweet cake to hide behind a plain takeout box. In addition, this also makes the cakes easy to store or transport, also making them ideal as party favours.
Korean lunchbox cake is very plain in terms of decoration, as the main focus is the written message on top. So, if you’re a fan of minimalist cakes, these are for you!

What size is it?
Korean lunch box cake is usually the size of a regular takeout container, or lunch box. The standard mini cake size is 10 cm (or 4-inches) in diameter, with about 5 cm (2-inches) in height. In terms of weight, they are typically around 300-350 grams (10-12 ounces). This is the same as 2 larger slices of regular-size cake or 3 smaller ones.
However, you can also make them larger to fit any takeout box or container you want to use. Sizes can vary between 4-8 inches, and the height of the cake can also be between 2-4 inches. Anything over 10 inches is already going into the region of regular cakes, so it wouldn’t be considered a lunchbox cake anymore.
Uses and ideas
The best part about Korean lunch-box cakes is how versatile they are and ideal for many different occasions. Here are some ideas when to make these adorable little cakes:
- Small celebrations for 2-3 people
- Birthdays
- Great gift for any occasion
- Children’s parties – perfect as party favours to take home
- Dating milestones and anniversaries
- Thank you cakes
- Get well soon
- Celebrating promotions or other milestones
- Picnics
- Just because you want to make someone smile
- If you’re trying to not overindulge and having a full-sized cake can be too tempting

What boxes to use
The best types of boxes to use for bento cakes are takeout containers. I recommend using clamshell take out boxes, which have a closing lid. This is the classic container that’s used by bakeries making mini lunchbox cakes in Korea.
Clamshell container boxes come in a range of sizes and heights, and I recommend ensuring it’s not too bit or too shallow for your cake. The container you choose should be the perfect size for your cake, so it does not move around too much. Also, ensure there are no partitions within the box, so the cake can sit flat.
- 6 x 6 inches white clamshell takeout box – perfect standard size for this type of cake. I like to buy compostable boxes because they’re also nature friendly.
- 6 x 6 inches brown burger takeout box – also compostable, made from plant fibre and eco-friendly.
- 5 x 5 inches transparent cake boxes – great if you want to showcase your cakes, but they’re not as authentic as clamshell takeout boxes.
- 6 x 6 inches cake boxes – for a more high-end or luxurious presentation.
Ingredient round-up

For the cake
- Flour – I recommend using cake flour, which is much finer than AP flour and has less gluten. This type of flour yields much softer and fluffier cakes.
- Baking soda – Raising agent in the batter, cannot be substituted in this recipe.
- Sugar – Regular granulated sugar works best, but you can also use brown sugar if desired.
- Eggs – This recipe calls for large eggs. Leave the eggs out at room temperature for at least 2 hours before using.
- Vegetable oil – Makes the cake extremely moist and soft. I recommend using an odourless and flavourless vegetable oil, like sunflower or canola oil.
- Milk – Any type of milk can be used, including lactose-free or plant-based alternative.
- Vanilla extract – Adds a wonderful flavour to the cake. Can be replaced with other extracts (lemon, orange, rum etc) or vanilla bean paste.
- Salt – I recommend using extra fine salt for this recipe.
For the filling
- Cream cheese – Use full-fat cream cheese, like Philadelphia. I do not recommend using low-fat version, as it has a higher water content, which can make the frosting too soft.
- Heavy whipping cream – Any type of heavy whipping cream will work. Ensure it’s properly chilled in the fridge before using.
- Sugar – Powdered sugar works best, as it makes the smoothest frosting.
- Vanilla extract – Adds a lot of flavour to the frosting. You can also use vanilla bean paste for a more intense and natural flavour.
- Jam – Optional, but highly recommended for extra flavour. I recommend using a fruit jam with actual fruit chunks for some texture and extra flavour. Some of the best options are strawberry, raspberry, blueberry, or blackberry jam.
How to make Korean lunchbox cake
This recipe is enough to make 3 vanilla miniature cakes. If you need to make more, adjust the quantities accordingly (double to make 6 cakes, triple to make 9).
Making the vanilla cake

- In a large bowl, start whipping the eggs and sugar. Keep whipping until the mixture triples in volume and becomes pale in colour.
- Mix in the remaining wet ingredients and combine well.
- Sift in the flour, salt, and baking powder. Use a spatula to fold them into the batter.
- Pour the batter into a lined tray and bake until golden.
Preparing the cream cheese frosting

- In a mixing bowl, whip up the cream cheese and sugar until fluffy.
- In a separate bowl, whip the heavy whipping cream until medium peaks.
- Add the whipped cream into the cream cheese mixture.
- Combine well, then place in a piping bag and refrigerate until ready to use.
Assembling the cake

- Use a cookie cutter to cut 8 circles.
- Add frosting on one cake circle, then smooth with a spatula. Pipe a ring of frosting on top, which will hold the jam filling.
- Add your jam of choice in the middle, spreading it evenly.
- Place another cake layer on top of the filling.
- Cover the entire cake in frosting, then use a spatula to smooth it out.
- Chill cake well before decorating it as desired!
Pro tip: if you’re planning to write on the cakes, I recommend using a toothpick to sketch out the letters before piping them on with frosting.
Flavour Variations
The recipe below is features vanilla sponge with cream cheese frosting and jam filling. However, Korean Lunchbox Cake can come in all flavours and fillings, so here are some alternatives and variations:
Sponge Flavours
- Chocolate – mix 1-2 teaspoons of raw cocoa powder with 2-3 tablespoons of warm or hot water. Then simply mix the chocolate paste into the cake batter.
- Red velvet – The same method as the chocolate cake above, but also add in 2-3 drops of red food colouring.
- Lemon / Orange – add 1-2 teaspoons of freshly grated lemon zest and 1 teaspoon of lemon extract for the most amazing citrus zing flavour. The same method works for orange sponge as well.
- Strawberry – add freeze-dried strawberry powder into the cake batter for a natural strawberry flavour. You can also try strawberry extract.
- Coffee – dissolve 1-2 teaspoons of instant coffee in 1-2 tablespoons of hot water. Mix it in with the rest of the wet ingredients.
- Carrot cake – I recommend using my recipe for Double Layer Carrot Cake to make the most decadent cake ever.
- Box cake – if you’re in a rush, cake mixes are your best bet! They come in a lot of different flavours, like this adorable Rainbow Chip Cake Mix.
Fillings & Frostings
- Quick Chocolate Cream Cheese Frosting – you can use the exact recipe below to make chocolate whipped cream cheese frosting. Add in 1-2 teaspoons of raw cocoa powder.
- White Chocolate Cream Cheese Frosting – this is a more advanced and incredibly tasty frosting that takes the cake from delicious to incredible. This recipe can also be made with milk or dark chocolate.
- Vanilla Pastry Cream – if you love classic flavours, this filling is the best choice. It’s silky smooth, thick, custardy, and incredible. Note: pastry cream is not suitable to cover the cake, it can only be used as a filling.
- Baileys Mascarpone Frosting – If you’re making winter or Christmas themed cakes, this is the perfect frosting. Bonus – it can also be used to cover the cakes.
- Kinder Bueno Spread – the perfect filling for Kinder Bueno lovers. This homemade spread tastes exactly like Kinder bars and it’s finger-licking good!
- Buttercream – you can use any type of buttercream: American, Swiss or Italian Meringue. They will all work really well with this cake!
- Jams – lastly, even if you use a plain frosting, you can elevate the flavour by adding jam between the cake layers. I suggest the following: strawberry, blueberry, raspberry, blackberry, marmalade, cherry, rhubarb, cranberry or rose. The choices are endless, feel free to experiment!

Success Tips & Tricks
- Use a kitchen scale – It’s important to measure ingredients properly for a perfect sponge. I recommend using a kitchen scale in grams for accuracy. If using cup measurements, make sure you spoon and level.
- Room temperature ingredients for sponge cake – All ingredients for the sponge needs to come to room temp for at least 2 hours before you start baking. This will ensure they combine together well, without any splitting.
- Cake flour – for the lightest and fluffiest cake layers, use cake flour. This type of flour contains less gluten and protein that AP flour, yielding softer cakes.
- Whip up the eggs until double in volume – This is probably the most important tip when making the sponge. Whip up the eggs until they become pale in colour and double or even triple in volume. This can take up to 10-15 minutes, so be patient,
- Carefully fold in the flour – Sift in the dry ingredients and use a spatula to gently fold them in. It’s important to go slowly so you don’t deflate any air from the eggs.
- Well whipped cream – Before combining the whipped cream into the cream cheese, ensure it reaches medium-stiff peaks. Afterwards, use a spatula to fold everything together, without overwhipping.
- Chill cake layers – Once baked, let the cake cool down completely before cutting your shapes. After this, wrap up all the cake layers in plastic wrap and chill them in the fridge for a few hours or overnight. Although not mandatory, this does help mature the flavour of the sponge and makes it extra moist.
- Use a piping bag with nozzle – I recommend using a piping bag fitted with nozzle not just for decorating, but also for filling the cake. This will give you much more even layers and make the process mess-free.
- Use a toothpick to sketch out design – Before decorating the cakes with colourful icing, sketch out your design using a toothpick. If you make any mistakes, simply smooth out the top again with a spatula and start again.
- Chill the cake – Once the cakes have been frosted and decorated, let the chill in the fridge for at least 1-2 hours. The frosting needs to harden before transferring the cakes into boxes.
- Right size boxes – Get the right size takeout box for the cakes to avoid it from moving around. If the cake fits in perfectly, it’s less likely to get damages if transporting it.
- Line the boxes – I like to use colourful wax paper, but you can also use parchment paper sheets. Cut them to size as needed. Lining keeps the box from getting wet from the frosting and makes it look cuter too.

How to decorate
Korean lunchbox cakes are usually quite minimalist in design, so there's no need to do anything too complicated. I recommend using colourful frosting, sprinkles or fresh fruit to decorate the top. Don't overly decorate and leave enough space for lettering your custom message on top.
If using frosting, place it in a piping bag fitted with a nozzle (round or star-shaped) to pipe small dollops of cream on top. You can also draw on little hearts, flowers or stars - basically anything simple and cute!
For writing messages on top, use the smallest round nozzle you can find. Sketch out your design first using a toothpick so all the letters are spaced out properly.
Here are some messages in Korean you can use for a more authentic cake:

How to store
Once filled and decorated, Korean lunchbox cake can be stored in the fridge. Store them in the takeout box for up to 1 day. For longer storage, place the cakes in an airtight container to avoid the cakes getting ‘fridge smell’ and refrigerate for up to 2-3 days.
For longer term storage, you can freeze the cake layers after baking. Cover them in plastic wrap, then with a layer of aluminium foil to prevent freezer burn. Freeze for up to 3 months and thaw in the fridge overnight. Fill and decorate as normal.
Frequently asked questions
Korean lunch box cakes are typically 4 inches in diameter and 2 inches in height. However, they can be smaller in diameter (3 inches) or larger (5-6 inches). Anything larger than 8 inches wouldn’t really be considered a lunchbox cake anymore, as it wouldn’t fit in a takeout container.
Because they fit in a lunchbox! This small cake is cute and dainty and fits in a 4-inch takeout box.
Divide the frosting into smaller bowls, then colour each one differently. Place the frostings in separate piping bags fitter with nozzles, then decorate as you wish. Korean lunchbox cakes are typically quite plain, so keep it simple! The most important part is the message written on top of the cake.

If you enjoyed this recipe, you will love these too:


If you’ve tried this recipe out, please don’t forget to rate and comment on this post. I love hearing from you, so feel free to reach out to me on social media as well and tag me in your posts!
Recipe

Korean Lunchbox Cake (도시락 케이크)
Equipment
- Hand mixer (or stand mixer)
- 8 x 12 inch rimmed baking tray* (20x30 cm)
- 4-inch round cookie cutter (10 cm)
Ingredients
Vanilla Sponge
- 3 large eggs, room temperature
- ½ cup sugar (100 grams)
- 2 tablespoons vegetable oil* (30 grams)
- 2 tablespoons heavy cream (30 grams)
- ¾ cup cake flour* (100 grams)
- 1 teaspoon baking powder (5 grams)
- ¼ teaspoon fine salt
- 1 teaspoon vanilla extract
Whipped Cream Cheese Frosting
- 1 cup cream cheese, full fat (250 grams)
- ⅓ cup powdered sugar (50 grams)
- ¾ cup heavy whipping cream (200 grams)
- 1 teaspoon vanilla extract
Optional
- fruit jam, for filling
- food colouring, for decoration
Instructions
Vanilla sponge
- Preheat the oven to 320°F (160°C). Grease a 8 x 12 inch (20x30 cm) baking tray and line with parchment paper.
- In a large bowl, beat the eggs and sugar on high until the mixture becomes pale in colour and triples in volume. This can take between 10-15 minutes depending on the mixer.
- Add the oil, heavy cream, and vanilla paste into the eggs, mixing to incorporate.
- Sift in the flour, baking powder and salt. Gently fold the dry ingredients into the wet using a spatula without deflating the air whipped into the eggs.
- Pour the batter into the lined tray and level it using a spatula. Rap the tray on the work surface a few times to remove any bubbles.
- Bake for 12 minutes on until a skewer comes out clean. Once baked, let the cakes cool for 5 minutes, then place them face down on baking paper. Peel off the bottom layer of baking paper (used to line the tray).
- When the cakes are cooled, use a 4-inch (10 cm) round cookie cutter to cut out 6 circles. These are the cake layers.
Whipped Cream Cheese Frosting
- Add the cold cream cheese into a large bowl. Using a hand mixer, whip it until pliable and fluffy, for about 2-3 minutes.
- In a separate bowl, add the heavy cream, sugar, and vanilla paste. Whip with a hand mixer until medium-stiff peaks. Do not overmix as it can make the cream curdle.
- Add the cream cheese into the heavy whipped cream and combine with a spatula. Stop when the mixture looks fluffy and smooth, do not overmix.
- Divide the frosting into two parts. Place one in a piping bag fitted with a ½ inch round nozzle, then chill in the fridge.
- Divide the remaining frosting in different parts and colour as desired. Store in the fridge until ready to use.
Assembling the cake
- Pipe frosting on the bottom layer, then spread it evenly with a spatula or cake knife.
- If using jam filling, pipe a ring of frosting on the perimeter of the circle. Fill the inside of that ring with jam of choice.
- Sandwich the frosting with a top cake layer, pressing down gently to help it stick.
- Cover the entire cake in frosting, then smooth everything out with a cake knife. Chill the cake for 30 minutes or 1 hour before decorating.
- Cover the base frosting with colourful frosting, then level again with a cake knife for a smooth finish. Decorate as desired with sprinkles, pipe dollops of colourful frosting or fresh fruit.
- Sketch out letters with a skewer before piping them on. Chill the cake for at least 1-2 hours before transferring it into a takeout box.
Notes
- I recommend using a kitchen scale in grams for more accuracy. The cups used for the conversion are standard US customary cups (1 cup flour = 136g). There are many different types of cups across the globe, which is why I strongly recommend using grams instead.
- Nutritional value is estimative and it's calculated per serving without jam filling (this recipe makes 3 mini cakes).
- Vegetable oil - use an odourless and flavourless oil like sunflower or canola (rapeseed).
- Cake flour - can be replaced with plain flour. Self-rising flour cannot be used for this recipe.
- Storing - store in the fridge inside takeout box for 1 day. For 2-3 days storage, keep in airtight container in fridge.
Nutrition
Pin this recipe for later!

Hugh says
Hello, these look amazing! I was just wondering, is it possible to make them vegan?
Hanelore Dumitrache says
Hi Hugh, I haven't tried making this recipe vegan yet. I recommend using your favourite vegan sponge recipe, then use a plant-based whipped cream for the filling. I will look into developing a vegan alternative in the near future, so stay tuned!
Thanks,
Hanelore
Paloma J says
My boyfriend is Korean so I wanted to surprise him with a cute cake. The decoration template you provided was so helpful thank you very much! The cake was really delicious too, he was very happy!
Davina says
I love baking for birthdays but we always end up having too much cake. This was perfect and so cute in the takeout box!
Myka says
Thanks for the decorating template came it really handy for the cake
Darcy says
Hi, planning to make this recipe soon! I also wanted to ask if the oven temperature was for a convection or conduction oven. Thanks in advance!
Hanelore Dumitrache says
Hi Darcy, the temperature is for a convection oven (or fan-forced oven). For a conduction oven, the temperature would be slightly higher, about 350°F (180°C). Nevertheless, I recommend keeping an eye out on the cake after 8-10 minutes and use the skewer to make sure it's cooked. I hope this helps and I really hope you enjoy this recipe! Han 🙂
NAAMARISSE says
Hi, love this page. It is practical, easy to understand, complete, educative, clear, give ideas, tricks, alternatives. Really give you instructions for what, how to prepare recipes, cultural simbolism, it is a truely excellent recipe page.
Hanelore Dumitrache says
Hi Naamarisse, I'm sp glad you enjoyed the post and the recipe! Thank you for your lovely comment! 🥰🥰
Caitlin says
Amazing recipe! Im not sure if I got the measurements wrong, but how do you get 8 circles out of the 20x30xm pan 🥰
Hanelore Dumitrache says
Hi Caitlin, I'm so glad you liked this recipe! 🥰 And you are absolutely right, I'm so sorry I mixed things up - the maths ain't mathin'! 20x30cm pan makes 6 circles (3 cakes). I will amend this in the recipe!
I made this recipe multiple times so for the 4 cakes I used a 25 x 40cm tray. I cut out 6 full circles, then 4 half circles from the scraps. You can use any halves on the bottom tier, as the frosting will stick them together and hide the seam.
I hope this clears things up!
Shay says
Firstly the cakes came out really well and they were really soft. Secondly the decoration template was sp helpful! Thanks so much for that, made a big impact at my Kpop party!
Sara says
Hi,
what could I use instead of heavy whipping cream if I do not have that? I have heavy cream and greek yogurt. Could I sub those?
Hanelore Dumitrache says
Hi Sara, you can use heavy cream as it's essentially the same thing. As long as it whips into a firm cream, it's good to go! I don't recommend greek yoghurt for the frosting, as it will make it too soft.
Happy baking!