


Home made vs store bought
Burgers are probably in my top 5 favourite foods. What makes or breaks a burger, in my opinion - is the burger bun. You can have the best quality meat, the freshest salad and tomatoes or the tastiest burger sauce, but if the bun is not pillowy soft and slightly crunchy on the outside the burger will be compromised.
Store-bought buns, although they are good replacements if you're in a rush, just can't compete with a homemade burger bun from scratch. All it takes is a little time, a dash of love and good flour to make the tastiest burger buns you've ever eaten. I guarantee that once you make your own you won't go back to store-bought.
This burger bun recipe can be made either as a simple bun or made into adorable little creatures to make them more appetising for children or adults alike. Like I always say, food should never be boring. These little bears don't require any specific artistic skills, just a tiny bit of patience.

Let's talk about buns baby!
This recipe can be used to make burger buns in any shape. Below there's an example of a plain burger bun, or if you have a few spare minutes you can always make teddy bears, turtles, dogs and so on.
To make the Teddy Bear buns you only need some simple ingredients: flour, yeast, milk, butter, salt and sesame seeds. Most of us have these ingredients at home, and the end result will be incredibly delicious.

The yeast
I always like to use fresh baker's yeast, as I find it's much more reliable than dry yeast and gives in a better rise. If this type of yeast is hard to come by, dry instant yeast will also do a great job. Keep in mind that the ratio is generally 2:1 - for 15g of fresh yeast you need around 6-7g dry instant yeast.
The flour
Using good quality flour will significantly improve the taste and texture of your buns. Although white bread flour will work well, I like to use organic whole wheat flour. This type of flour is generally considered much healthier, due to it having more fiber and being richer in nutrients such as calcium, iron protein and a variety of vitamins (B1, B3, B6 etc).
Compared to normal bread flour, whole wheat absorbs more water. If you want to make plain burger buns, reduce your liquids by about 10%.
How to make Teddy Bear Buns
Preparing the dough
First we need to let the fresh (or dry) yeast dissolve in some warm milk. Adding a bit of sugar helps the yeast activate faster.
In a separate bowl mix your flour, salt, melted butter (not too hot), egg and yeasty mixture. Mix the wet and dry ingredients to combine. Once incorporated, knead with your hands until the dough becomes less sticky. The dough will resist you a bit in the beginning by sticking to your hands, but please do try to resist the urge to add more flour - this will make your buns much more dense. Be patient with your dough!
Let the dough prove for 1 hour or until it doubles/triples in size. Divide the dough into 3 large parts to form each burger bun and 1 slightly smaller part to keep for the bear nose, ears and eyes. If you're making plain buns, you can divide into 3 larger parts, and skip all the steps below.
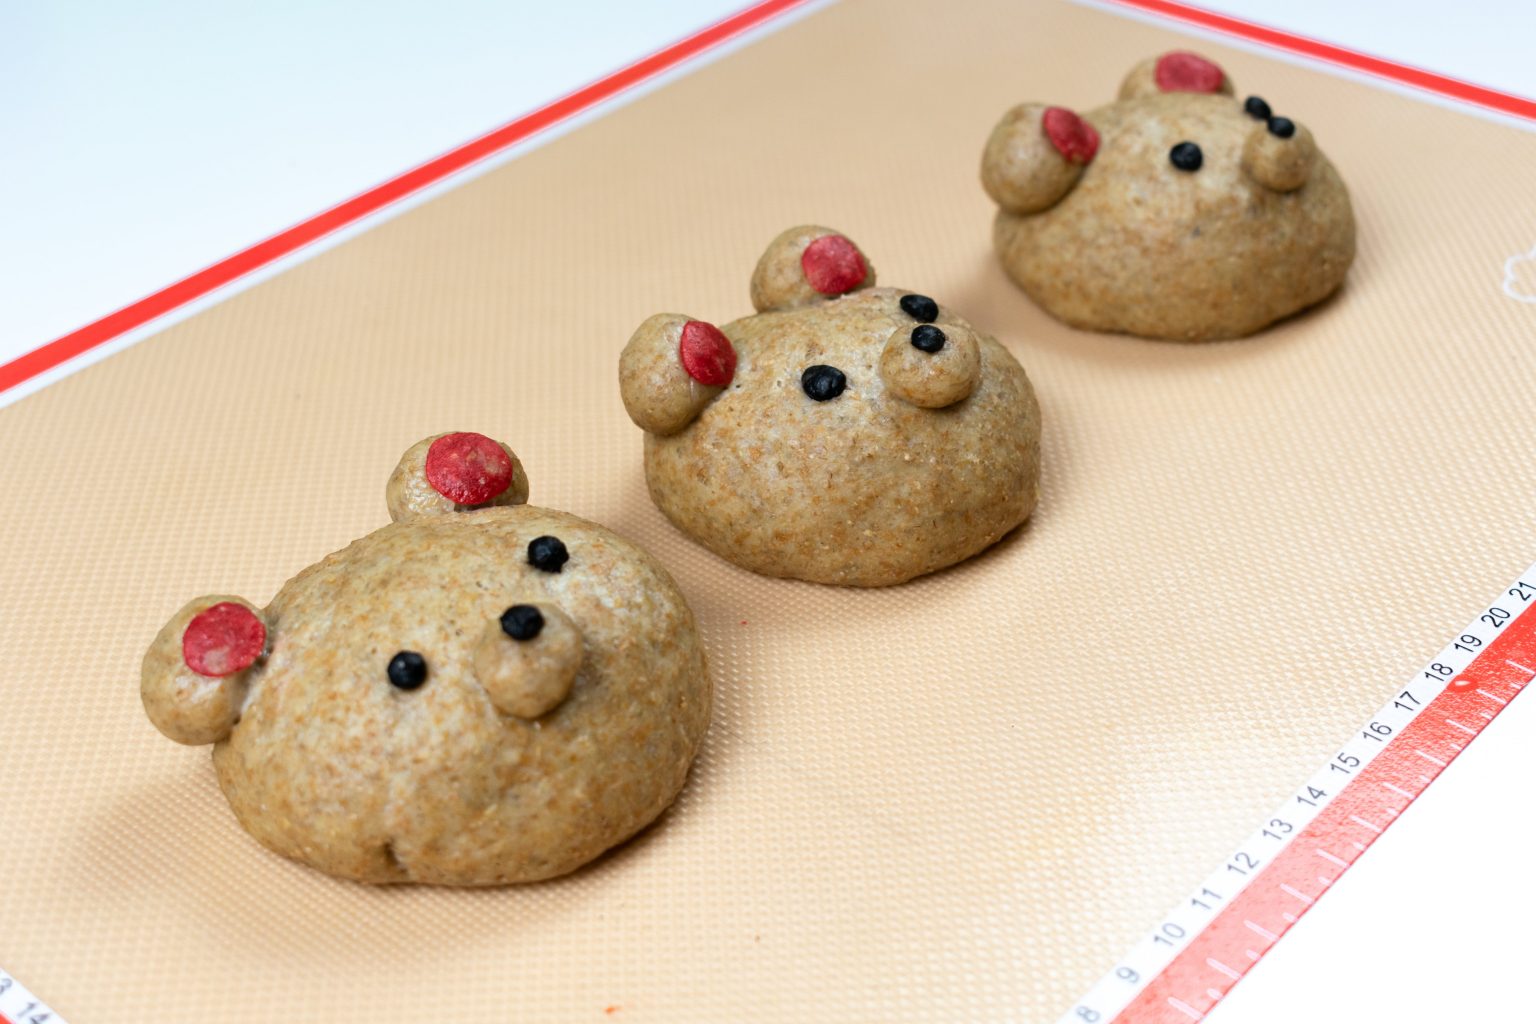
Making the Teddy Bear shape
This is where things get really fun! I really recommend doing this with the kiddies in your life, or if you're a big kid like me - you're in for some fun. These Teddy Bear Buns are really adorable and they make for a great activity for the kids.
Use black food colouring to make one of the each smaller balls of dough black. These will become the eyes and nose. The other smaller ball of dough colour it pink or red to make the inner ears of the bear.
Attaching the smaller pieces of dough is easy, simply dip your finger in some water, then gently brush it over the surface you want to stick onto. This will make the pieces of dough attach much more securely to the burger bun. Let's start attaching: first the nose, the ears, then the eyes and inside of the ears.

Baking the buns
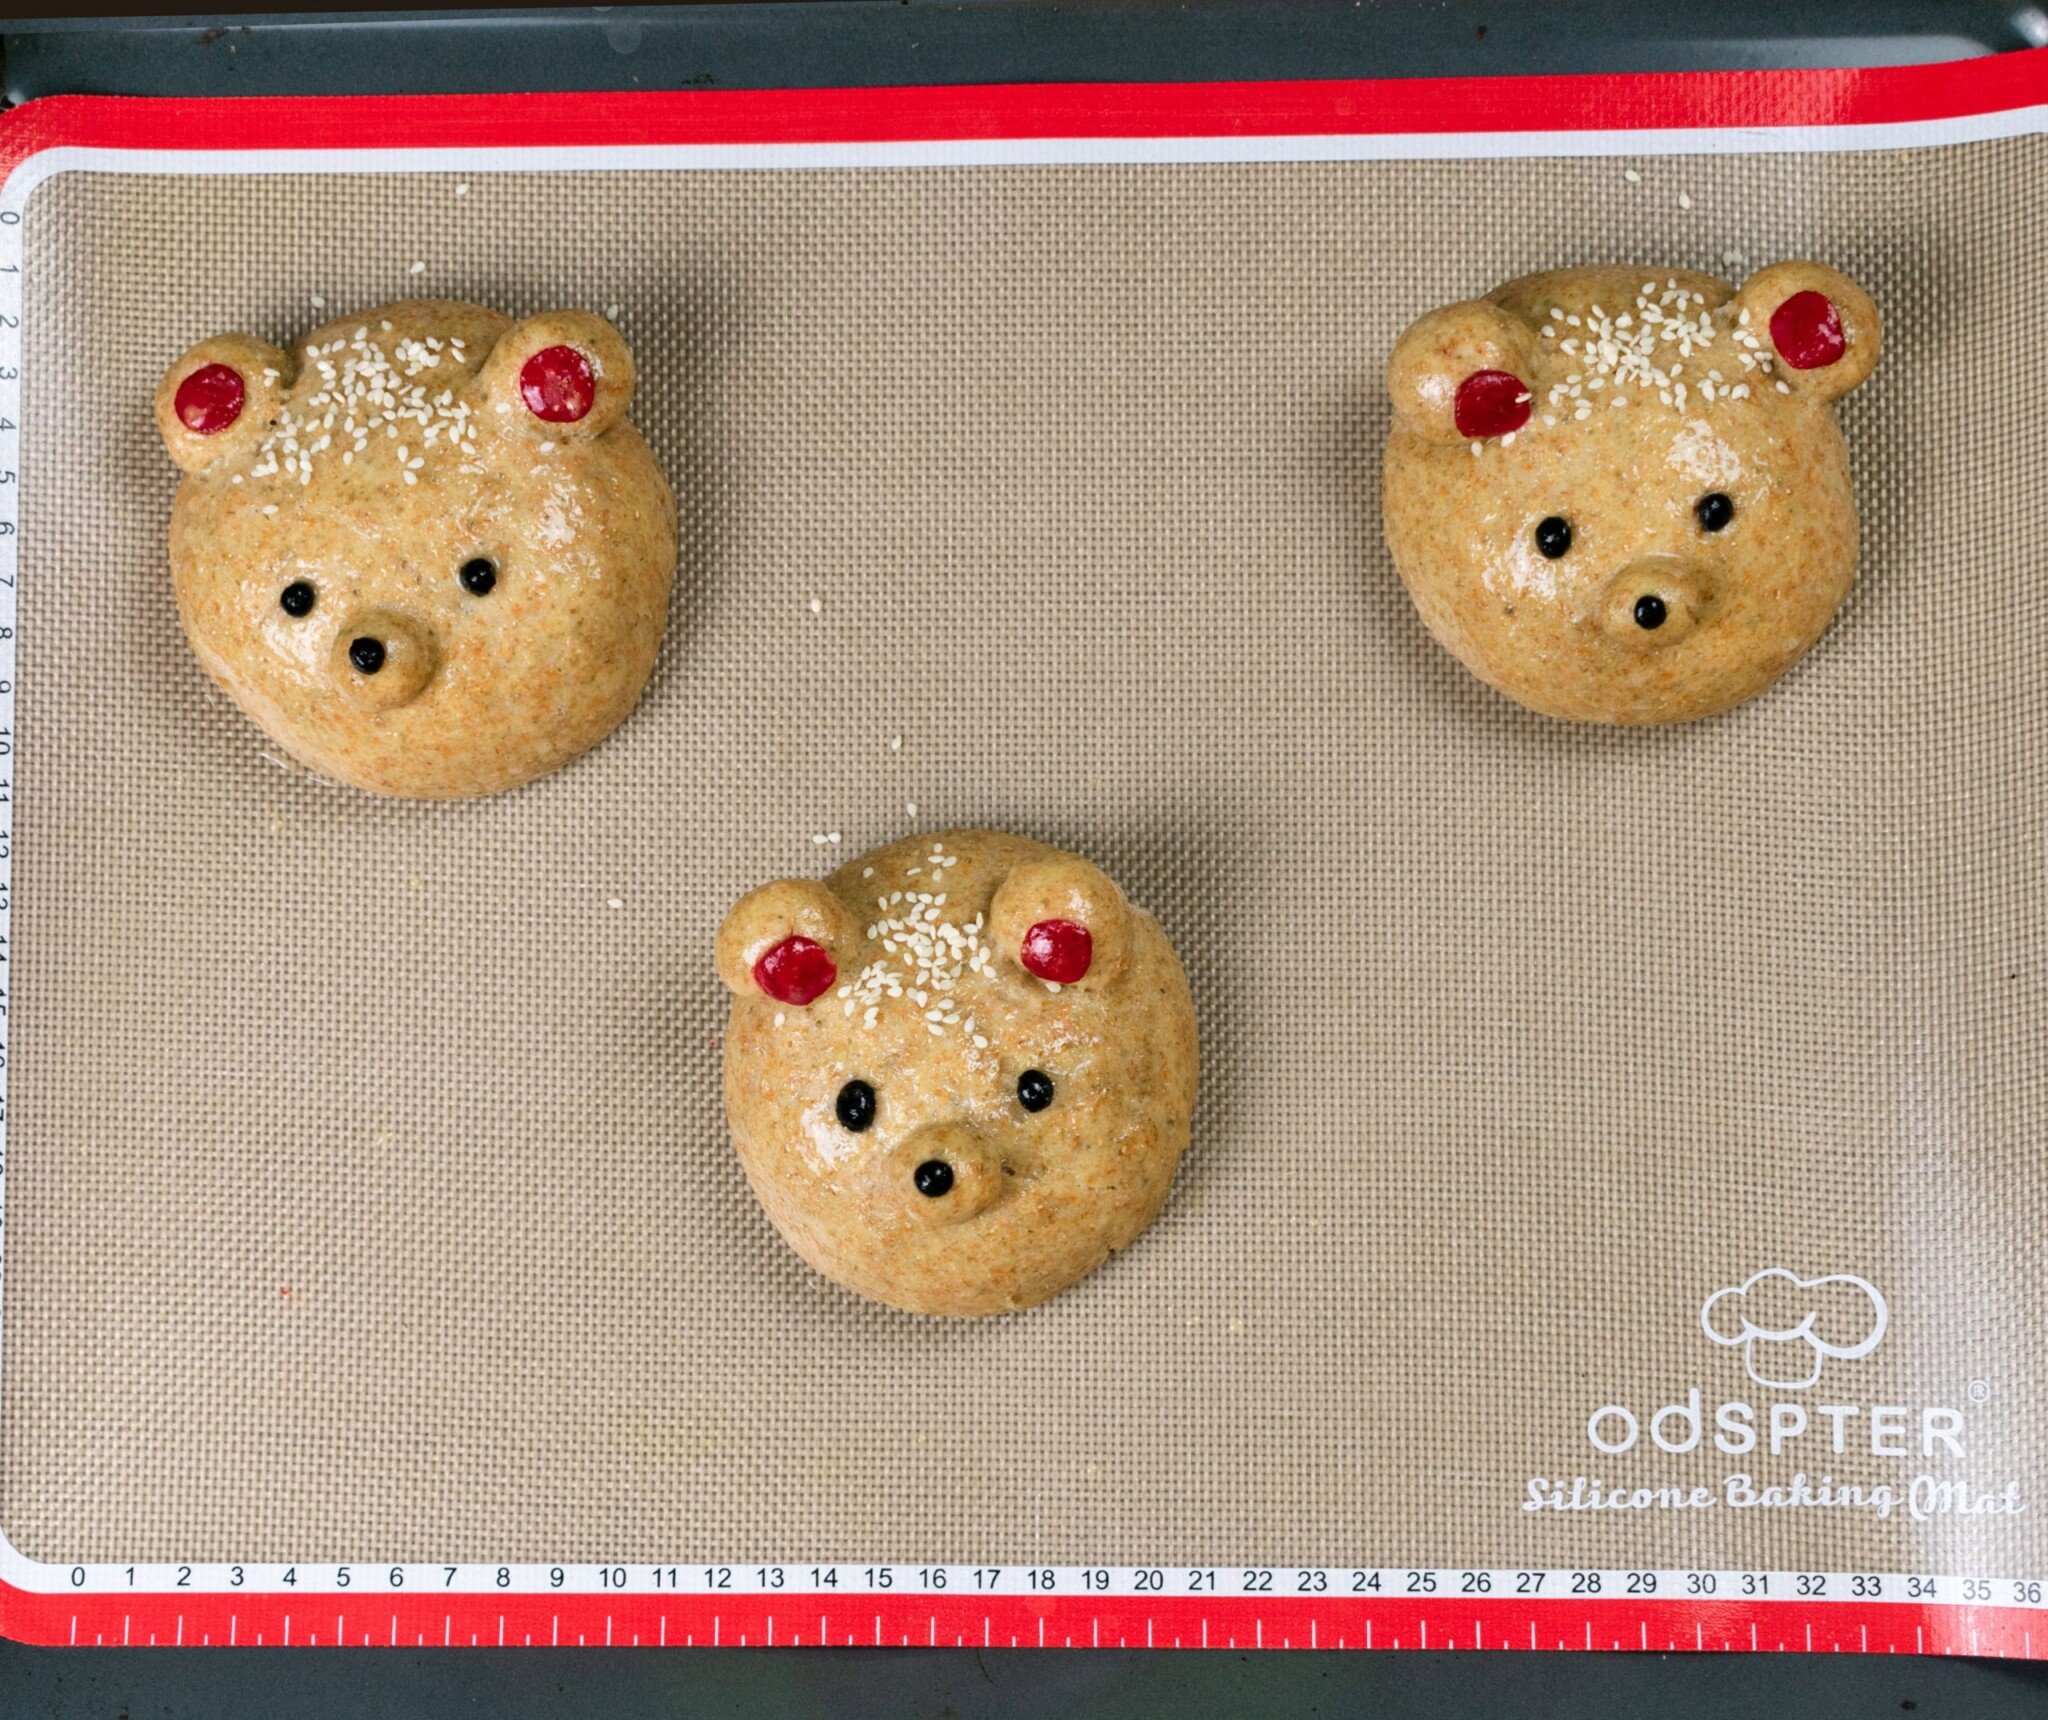
Once your burger buns are ready, let them rest for 20 minutes so the dough rises a little. Pre-heat your oven to 200C (or 180C with fan).
Brush the surface of the buns with some egg wash, then sprinkle some sesame or poppy seeds on top. Bake for 12 minutes or until golden brown on top.
I know by this point you're very keen to dig in and eat the buns, but please be patient for the buns to cool before cutting into them. Place the buns on a cooling rack and let them cool for around 20-30 minutes. If you cut into the buns whilst still hot, the chances are you won't get a clean cut and the bun might tear.
In the meantime, you can prepare your favourite burger filling: turkey and mushroom patty, rucola salad or spinach, cherry tomatoes and honey mustard sauce. Enjoy!

If you enjoyed this recipe, you will love these too:
If you’ve tried this recipe out, please don’t forget to rate and comment on this recipe. I love hearing from you, so feel free to reach out to me on social media as well and tag me in your posts!
Recipe

Teddy Bear Buns
Ingredients
- 300 g wholewheat flour (2 ⅓ cups)
- 14 g instant dry yeast* (2 satchels)
- 100 g milk, warm (⅓ cup)
- 30 g butter, melted (6 ½ tsp)
- 10 g salt (2 tsp)
- 15 g sugar (3 ½ tsp)
- 1 egg
Extra
- 1-2 drops food colouring, black & red
- 1 egg, for brushing
- 2 teaspoon sesame seeds
Instructions
- Place warm milk and yeast in a bowl. Stir to dissolve the yeast in the milk and sprinkle over the sugar to incorporate well. Make sure the milk is warm, not hot, as this can actually damage the yeast. Let the yeast bloom for 5-10 minutes.
- In a separate large bowl place flour, salt, melted butter, egg and the yeasty mixture. Mix with a wooden spoon or spatula to combine into a uniform dough.
- Use your hands to gently knead the dough. You will know the dough is ready when it doesn't stick to the sides of the bowl anymore.
- Add some olive oil in the bowl to prevent sticking, then let your dough prove for 1 hour. The dough will double or even triple in size once proved.
- Take out a walnut-sized ball of a ping pong ball and set aside. This will become the teddy bear's ears, nose and eyes.
- Divide the rest of the dough into 3 equal parts, which will become the bear heads. Roll each piece into a round ball by folding the edges under themselves, them rolling the dough gently on your work surface.
- Place the buns on a lined baking tray, leaving enough distance between the buns.
- Divide the ping-pong ball of dough into 3 equal parts for each burger bun. After this, we need to divide the dough into 2 larger balls (for the ears) and 2 smaller balls (for the nose and eyes).
- Wet the top of your finger with some water, then gently tap the burger bun where the ears and nose should go. The water will help the dough adhere to itself. Stick on the ears and nose and gently press to secure in place.
- The rest of the dough balls remaining from all three buns can be combined so we can colour it. Divide it into two parts and colour one half with red and the other with black food colouring.
- Divide the black dough into 9 really small balls of dough. Once more, wet your finger and place small dabs of water where the eyes and nose will go. Place the dough on the water spots you've just made and press gently to fix into place.
- The red dough will be divided into 6 small dough balls. Use your fingers to flatten each ball into a disc. Wet the inside of the bear's ears with some water, then place the red disc over it, pressing gently to secure it. We now have ears!
- Our bears are now completed, so we need to let them prove for 15-20 minutes. Place a tray or large bowl over the buns, and make sure they don't touch the surface to prevent sticking.
- Pre-heat your oven to 180°C (360°F) fan-assisted. While the oven heats, brush the buns with some egg wash, and sprinkle some sesame seeds between the ears - this can become the bear's hair.
- Bake the buns for 15 minutes or until golden brown. Once baked, remove from the oven and let cool on a wire rack.
Notes
- I recommend using a kitchen scale in grams for more accuracy. The cups used for the conversion are standard US customary cups (1 cup flour = 136g). There are many different types of cups across the globe, which is why I strongly recommend using grams instead.
- Storing: you can store any remaining buns in the fridge for up to 2 days, or you can wrap them in cling film and freeze for up to 3-4 weeks.
angiesrecipes says
These are the cutest burger buns that I have ever seen! You are really talented, Hanelore.